Git (noun) /git/ : A foolish, worthless person - Merriam-Webster Dictionary
Git : A content management and tracking system developed by Linus Torvalds, creator of Linux. - Technopedia
Data science is a team sport. In most cases you’ll want to collaborate with others on the work you’re doing. With RStudio, collaboration is made possible by configuring your project to use one of two decentralized version control systems - Git or Subversion. In this section you’ll learn how to configure your RStudio Projects to work with Git and how to collaborate with others by hosting your projects on GitHub.
Git is a free, open-source, and decentralized version control system developed by Linus Torvalds in 2005. Git was initially created to enable fast, real time collaboration among the Linux development community during development of the Linux kernel. In Git, work projects are organized into repositories, or ‘repos’. A repo is simply a folder or directory containing a .git sub-directory created by Git. This sub-directory contains a number of files that store snapshots of the files contained in the repo. Whenever any file in the repo is modified, added, or removed Git creates a new snapshot. This framework makes it easy to undo any previous changes by simply reverting back to an earlier snapshot. With Git, you have access to all versions of every file in the repository at any time - it’s almost impossible to lose any part of your work. Plus, colleagues can work on the same project, simultaneously, without interfering with each other and without fear of losing any changes. Git was designed to handle every project, from the very small to the very large, with speed and efficiency.
To get started, install Git by following these steps:
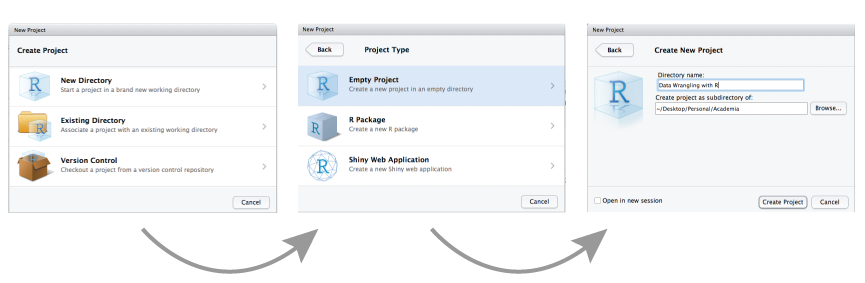
RStudio projects are associated with R working directories. You can create an RStudio project:
by selecting File » New Project and then completing the following set-up tasks:
When a new project is created RStudio:

When a project is opened (File » Open Project or by clicking on the .Rproj file directly for the project):
As you write and execute code in the project all updates and outputs created will be saved to the project directory. And when you close out of the project the .RData and .Rhistory files will be saved (if these options are selected in the global options) and the list of open source documents are saved so that they can be restored the next time you open the project.
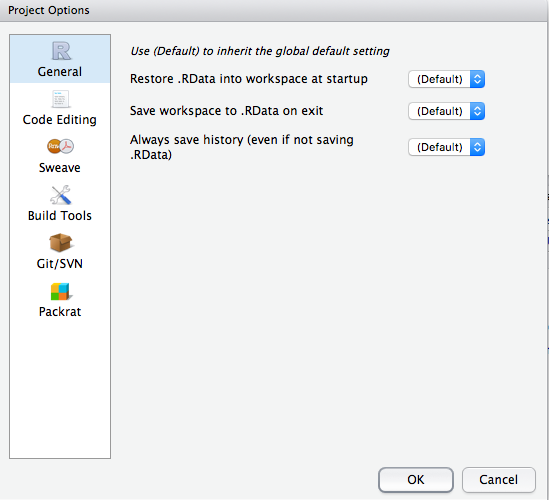
There are additional project options you can choose from to customize the project at Tools » Project Options. These project options are overrides for existing global options. To inherit the default global behavior for a project you can specify (Default) as the option value.